Help Joe Get a New Pancreas

Showing posts with label creature. Show all posts

Monday, December 24, 2012

A little Christmas Star Wars Cheer

So procrastination has gotten the best of me and the rush to finish a few crocheted Christmas gifts has kept me without much sleep in the last day and night. I have finished one of the gifts today (after burning the midnight oil until about 6am and starting all over again at 11am today...whew!) This FO was well worth the hours of work and sleeplessness as this lil guy turned out awesome. This gift is for my brother who is one of the biggest Star Wars geeks I know, who just so happens to be one of the few loyalists who like and appreciate those adorable butt-kicking Ewoks of Endor from Return of the Jedi.

So you ask, what better gift for a fan of the Ewoks and a fan of the 6th installment of Star Wars....of course...an Amigurumi Wicket!!


The pattern I used was manipulated from an original pattern ("Wicket-the-Ewok") by Lucy Ravenscar found on RavelryThe Pattern is also available at Craftster. I switched up a few things, just to make it my own and to adapt to my style of crochet.

This project was challenging in the following ways:
  • The torso is worked in 1 piece from the bottom up. This is a different technique that was very effective for the shape of the lower body, but not one I am accustomed to using, I plan on using similar methods in the future for legs/feet. The single torso structure aids in stability and form.
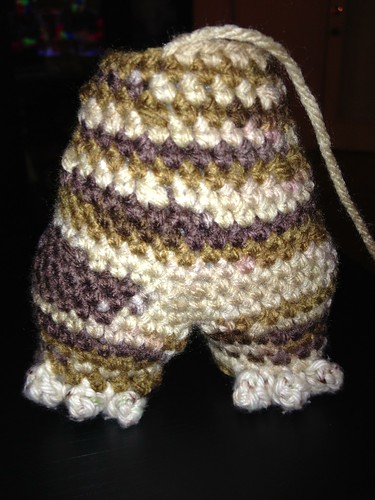
    Wicket Torso with toe detail
  • The pattern called for using a 3 dc bob stitch for the hands/arms and a 3 dc pop stitch for the feet/toes. Both of these stitches were a first for me. I ended up scrapping the 3 dc bob stitch for the fingers/hands and utilized a basic arm in the round instead. The finger work was a bit cumbersome to work with and I felt they ended up a tad too busy. I kept the special stitch 3 dc pop for the toes as they were great for the balance and overall look of the ami
Standard Arms worked in the round
  • There were 2 options for creating the face/head of Wicket. I opted for the more detailed and challenging of the two: Head #1 which uses embroidery detailing for the face and mouth. This was the most time-consuming aspect of the project, but all the time and effort that went into the detailing was well worth it! 
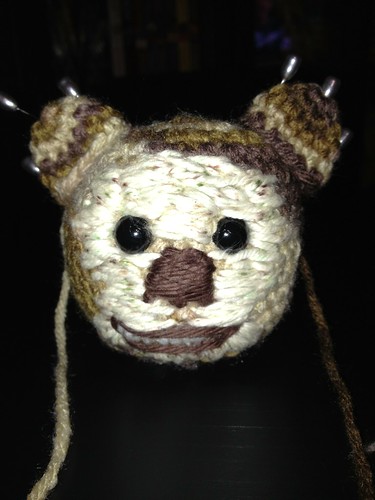
Wicket Head with embroidery detail
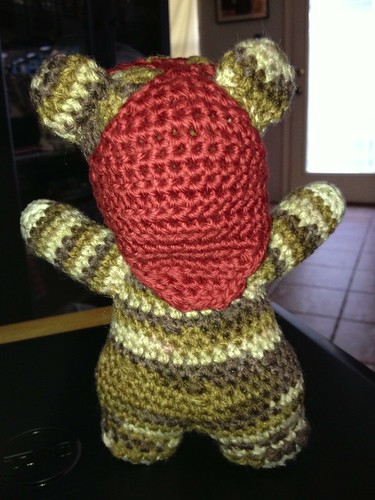
  • There were 2 options for creating the cowl. I originally was going to move forward with using felt for the cowl, which would have been a bit quicker, and the color I had picked out was nearly spot-on...something just told me to go for the crochet method for the cowl. Even though the yarn I had in my stash was a dark burnt orange vs a lighter russet color (which is more accurate) I think it makes the Ami a bit more unique & crocheting it was a blast! The cowl was worked in 2 parts (front/back) then whip stitched together & slipped over the head (So yes...it can be removed!)
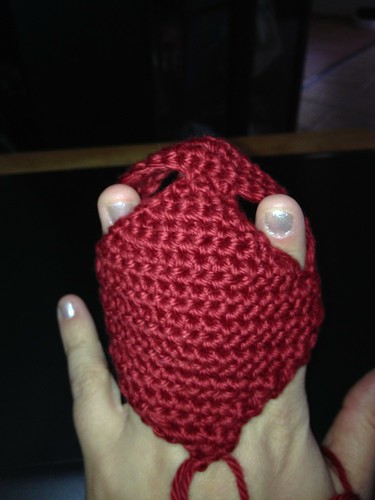
Wicket Cowl
Overall, I am super excited to give this gift to my brother tonight, as I know he will be excited! The only hard part is giving Wicket away, as he turned out so cute, & a part of me wants to keep him for myself....I guess I can always make another one!!
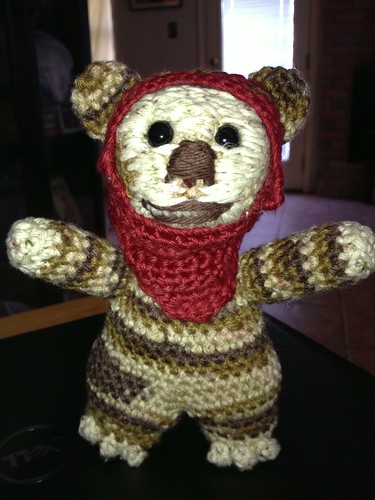
Wicket!

Wicket (Back view)

Now onto the next gift....

    
Thanks for reading!

Friday, June 8, 2012

Secret Project #2 WIP


I had a lot of fun with my last Secret WIP posts that I thought I could start up another one here. Quite a few of my friends/family have caught baby fever over the past year and lil ones are popping up all around me. My last Secret FO was an 'Under the Sea' themed baby mobile that was unveiled at my Sister in Laws baby shower. I am super excited about my next Secret WIP for the next lil one! I plan on posting the components of the project here as they are completed. I cannot unveil exactly what I am cooking up, since it is a gift, but it will be fun posting lil "glimpses" of the project along the way.

Here is the first glimpse:

What could it be?

The picture is a bit dark, but this is the start of the Amigurumi.


Stay tuned in for further glimpses of my new Secret WIP!!!


Thanks for reading.

Wednesday, December 1, 2010

WIPW: Week 17


Well this week has been a bit busy, so I havent had a ton of time to work on my ever-growing Xmas gift lists, but I did have a bit of time last nite to at least get a few things done....WHEW!!!

1st things 1st:

XMAS GIFT #3: (FO)
HELLO KITTY PURSE


I am proud to say that I FINALLY finished the Hello Kitty purse I have been blogging about the last coupla weeks! It was a challenging project for me because it incorporated a little bit of sewing, including snap attachments and purse lining. I have never practiced much with sewing, my only experience comes from a bit of knowledge in cross-stitch! I am proud to say, that while it is far from perfect, it turned out OK, and now I am a "tad" more comfortable with stitching by hand.

Here is a pic of the lining and snap attached leading up to the FO:
Lining and snap button detail for inside of Hello Kitty Purse


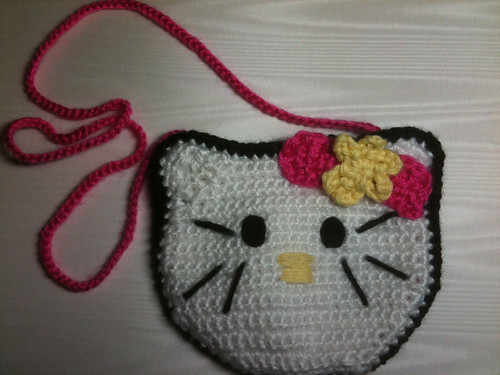
...and the FO!

Hello Kitty Purse: FO
 I also was able to finish a few more components for my Luigi (from the famous SuperMario Bros) Ami. I really wanted to be able to finish this project up this week, but there wasn't enough time. Next week I should be able to finish up the last few components (1 leg, the hat, and the hair/sideburns) and assemble the Ami!!

XMAS GIFT #6: (WIP...cont)
LUIGI

THE LEG:

Luigi Leg


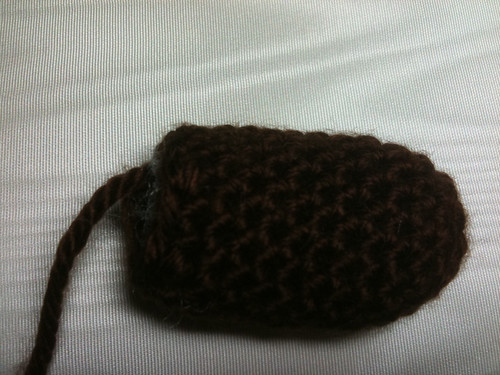
THE SHOE:

Luigi Shoe


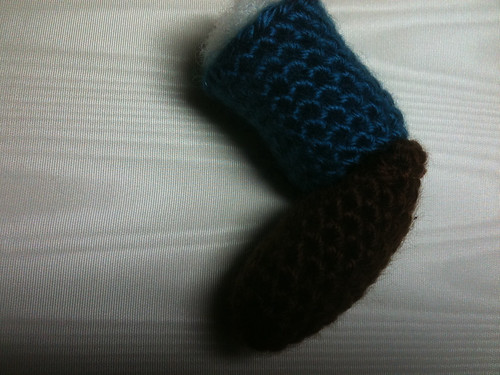
THE LEG WITH SHOE ATTACHED:

Luigi Leg with Shoe attached


THE SUSPENDERS:

Luigi Suspenders


THE ARMS/GLOVES:

Luigi Arms/Gloves


XMAS GIFT #9: (WIP)

SNOWMAN

I decided on making a little snowman Ami for one of my grandmothers for Xmas as well. Christmas is a big holiday in my family and my grandmother never skimps on the holiday decorations. This little snowman will be perfect for a table centerpiece or just to place on the mantle. I think she will like it. I started this late late last night, so I was only able to complete the head with the safety eyes attached, minus the facial details. I am once again using I am using Lion Brand Wool-Ease Glitter yarn in White/Multi for the scarf project. It is a perfect holiday yarn with that touch of glitter/shimmer!


THE HEAD:
Snowman Ami


Well...that about wraps it up for me this week. I am glad I accomplished finishing the Hello Kitty purse! It is going to be a great gift for my lil cuz! Hopefully next week I will have a Luigi and a Snowman FO!!!
 
Thanks for reading!!

Saturday, August 7, 2010

Plush Team August Giveaway!

Well...it is time for yet another Plush Team August giveaway! Woo Hoo! If you are not familiar with their blog...you SHOULD be! Hop on over there now...

So here is a bit about this months giveaway:

"The Plush Team's August giveaway is hosted by none other than Absolutely Small! Perhaps better known as the creative madness behind Chicken Pants, Absolutely Small is offering Agnes the Magpie for this month's plush prize!"

She is adorable:


Agnes the Magpie!


Here is a direct link to enter the Augus giveaway for your very own Agnes!

Sunday, August 1, 2010

Follow my Traveling Creature Laboratory! The Adventures of Gruesilla...

So if you have been following this blog I recently joined a Ravelry Group called the Traveling Creature Laboratory. You can read more about them here or in my previous post from Wed July 28th 2010. Here are the group details...

GROUP DETAILS:


Hello there, welcome to the lab and see what’s on the slab! We’re creating creatures of all sorts, most aren’t even of this earth. We’re a traveling amigurumi group in hopes of going viral. Join us, it’s fun!

I have joined current Circle #5 as of yesterday. I will be posting my progress within the current project here in my blog.
 
WARNING!!!
 
If you are currently a part of this trading circle #5 as a warning there will be spoilers here on my blog detailing the progress of work with all the creatures I receive. So if you wish to be suprised dont look at the pictures I post of your creatures. I will put a spoiler link in the title of any blog that has photos or detailed descriptions of the progress. For all others please enjoy and stay tuned for the adventures of the Traveling Creature Laboratory.
 
So meet Gruesilla...
 
She is my creature that I will be sending all over the world to be completed. Here is her story.
 
Please help!
Gruesillas bits and pieces have gone missing! She is my most precious creation and now she is incomplete. I am lost without her, and need your help to get her back! I will be sending her body along to a neurologist who will give her her head and facial features back.
 
Stay tuned!

Gruesilla's Body

 
My nametag to identify her as she goes around the world!

Wednesday, July 28, 2010

Traveling Creature Laboratory

I just joined a group over on Ravelry called the Traveling Creature Laboratory. The group is a sort of elaborate crochet/knit creature creation swap. Their premise is totally awesome! Here is a quick bio of the group:

"We're a traveling amigurumi group in hopes of going viral. Join us, it's fun!"
GROUP DETAILS:

Hello there, welcome to the lab and see what’s on the slab! We’re creating creatures of all sorts, most aren’t even of this earth. We’re a traveling amigurumi group in hopes of going viral. Join us, it’s fun!

So what is a Traveling Creature Laboratory you might ask? Well here is a quick rundown of how it works.

From the group forum : How it Works:
  1. We’re planning on having 8 - 10 people in our first circle. Person A mails to Person B, B mails to C and so on until the critter comes all the way back home to Person A. Here’s the sequence of events…(for Person C)
  2. Prologue: Everyone makes their own basic body with the yarn of their choosing. I will be supplying a body pattern so that everyone will know what to expect as far as size and shape. I am recommending worsted weight yarn so that your critters will all be somewhere near the same size. Fiber content is entirely up to you, however if you are allergic to something, be sure and note that on the passport that we’ll be making available for you to download. The passport will travel with your critter wherever it goes.
  3. Once your body is complete, you mail it along with the passport (ziplock bag highly recommended) to the next person on the list. If you are person C, you will mail your stuffed body to person D. Mailing specifics are important. We do not want to have anyone’s critter get lost, so use delivery confirmation if at all possible. Please keep in mind that this will require you to commit to mailing a package every 2 weeks or so. Person C will always mail to Person D, D will always mail to E and so on.
  4. Now that you’ve mailed your body, you should receive a body from the person above you. If you’re C, you will receive a body from B. Now it is time to get creative. Read the passport, and then start making a head of your own design hopefully using yarn from your stash. Add safety eyes if you wish, but no other facial details at this point. Facial details will be added by someone else. Stuff the head and sew the head to the body and mail to Person D.
  5. Next you should receive from Person B a head and body sewn together. On this one, you will add arms - or upper body appendages of your own design and choosing. Stuff the arms if desired, and then sew them to the body. Now mail to Person D.
  6. The next critter you receive should have head, body and arms. You will add legs or other appendages to the lower part of the body (nothing naughty though - lots of us may want to show these to our kids). Once that is completed to your satisfaction, mail to Person D.
  7. Step 5 is to add ears, horns, hair or whatever to the head. Do not add facial features yet. You may want to deviate from crochet for these or not. The point is to be creative, so if you want to add horns or ears made of felt or fabric or Sculpey, go for it. Just be sure to read the passport that came with the critter to check for allergies. Once you have created what you want to, mail to Person D.
  8. Now take a good look at this next critter that arrives in your mailbox. Does it have tentacles instead of arms/legs? Does it look like it needs a tail or maybe wings? Or some spikes in a row down it’s back? Maybe a turtle shell? Add something of your own design to the backside of this critter. Then mail to Person D.
  9. This is the step to add facial details. The head may already have safety eyes attached, but you can add eyebrows, eyelashes, noses, mouths, teeth, whiskers, freckles, warts, whatever. Embroider them or add felt or whatever your creative mind comes up with. When done, mail to Person D.
  10. (and maybe 9 and 10) Depending on the number of people in the circle, there will be 1 - 3 more critters coming your way. Add some personality. Spots, clothes, hats, accessories, shoes, tutus, more tentacles and warts, tiaras, necklaces, earrings. Use whatever materials come to mind. Just check to make sure that you won’t be upsetting the owner’s allergies. And if there’s other people who will still be adding to it, leave some room for improvements and mail to Person D.
  11. Grand Finale: Congratulations! You are the proud new master of a new Creature. Your critter arrives back home all dolled up and probably sporting some unusual features. Read your new friends passport and see where he/she/its been. Now take a photo and add it to the gallery thread for everyone to see.
So stop on by ravelry.com and the group's page Traveling Creature Laboratory to see the progress of the next creature creation or join in yourself. I know I am going to.

Here are a few pics of the finished creatures!


Sparks!


Griffin!