Another week...Another WIP!!!
Well....1st things 1st....
Happy Thanksgiving to those who celebrate! Be safe and have a wonderful Holiday Week :)
I finished my 1st scarf ever!!! If you read along last week I ventured into scarf making territory. It seemed simple enough, but I was still a bit nervous because all I crochet these days tends to be Amigurumi. I think it turned out neat. Here is a pic:
XMAS GIFT #2: (FO)
TULIPS SCARF:
 |
| Tulips Scarf |
It is folded over so it is actually twice as long as the picture shows, but I didnt have a model tonight to get the full length in a photo. The scarf measures 65".
Now for a bit of advice for any readers out there.
The pattern calls for 'blocking' the scarf. From what I have read it is advantageous to block a scarf for the following reasons:
- Reduce curling, straighten edges and make sewing up easier.
- Get rid of slight variations in length or width between two pieces that should match.
- Open out a fabric, such as lace, to show off the patterning.
- Smooth the surface of the knitting and make the stitches more even.
- Adjust the shape of the finished garment or reshape it after washing.
'Blocking' scarf consists of the following steps: (Thanks to
Salihan Crafts for the tutorial)
HOW TO BLOCK A KNITTED SCARF
You’ll need wool detergent, a sink, washing machine, pillow case, a large flat surface like a bed and rust-proof pins.
1.
Wash
Fill tub or sink with warm water and add a little wool detergent. (Check the bottle label for exact measurement.) Soak scarf in warm soapy water for 5 minutes. After 5 minutes, roll the scarf gently while still in the water and pick it up in your hand. Make sure to support it well. Place aside.
2.
Rinse
Empty tub and refill with lukewarm water. Place scarf back into the water and unroll. Swoosh the scarf around lightly in the water.
3.
Spin
Get your pillowcase ready. Roll the scarf underwater and pick it up in your hands. Squeeze as much water out as possible. Place rolled-up scarf into a corner of the pillowcase (I use a bolster case). Tie a knot so that the scarf is squashed into the corner and will not move around. Set washing machine into spin cycle. Spin on fast speed.
4.
Blocking
Carry the pillowcase to a large flat surface like a clean bed. Take the scarf out and unroll it onto the bed. Carefully stretch the wet knitted scarf out onto the bed to about the width and length that you want. You may wish to stop at this point if you are satisfied with the way it looks and leave the scarf to dry completely.
However, you may need to pin the knitted scarf in place to really show the pattern and get the right size. This is especially so in lace knitting. Using rust-proof or dressmakers’ pins, pin along the edges of the damp scarf. Use as many pins as needed to keep the edges straight and even. Dry the scarf completely before removing pins. You have successfully blocked a scarf!
Questions:
- Is it necessary to block a crocheted scarf?
- Can blocking a scarf distort the pattern by stretching the material out?
- How much longer will the scarf stretch to after blocking? Mine is already measured at 65" and I am worried that if I block the scarf it will reach to the floor
If anyone has any suggesstions let me know :)
Now onto my new WIPs:
XMAS GIFT #3: (WIP...cont)
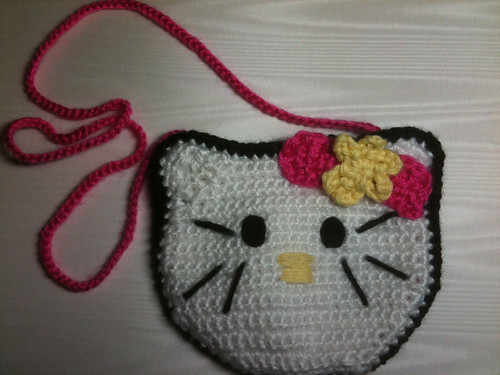
HELLO KITTY PURSE
I havent made a ton of progress on this from last week, because I had to go to the fabric store to get some material to line the purse, and a snap closure. I did get the back panel finished tho! All I have left is to sew the lining to the insides of the front/back panels, sew on the snap, and complete the strap. I should have it finished by next WIPW!
Here is a pic of the back panel and the lining material I picked out:
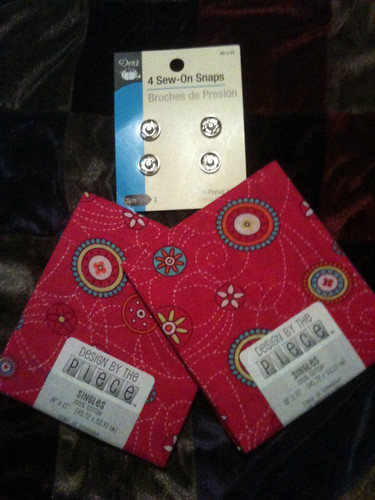 |
| Purse lining/snaps |
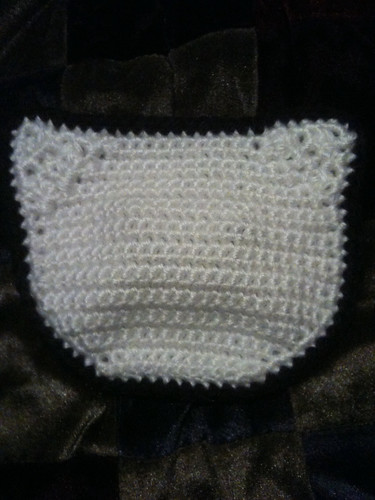 |
| Hello Kitty purse back panel |
XMAS GIFT #6 & #7: (WIP)
MARIO & LUIGI
For my Nephew I have decided to make everyones favorite Italian brotherly duo....Nintendo's
Super Mario Brothers...
Mario &
Luigi! He is really into the late 80s cartoon,
The Super Mario Bros. Super Show!
Yes...the one starring "Captain" Lou Albano as Mario for those of you who remember the show.
I once again have fallen back on utilizing patterns from
Linda Potts of
WolfDreamer off the Hook. Linda has some AMAZING videogame and cartoon related designs on Ravelry and her site. If you have a chance I highly recommend you stop by and browse her work.
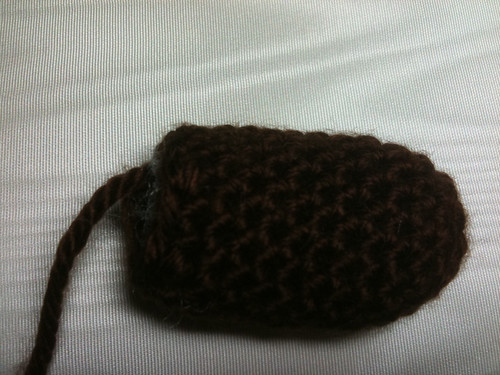
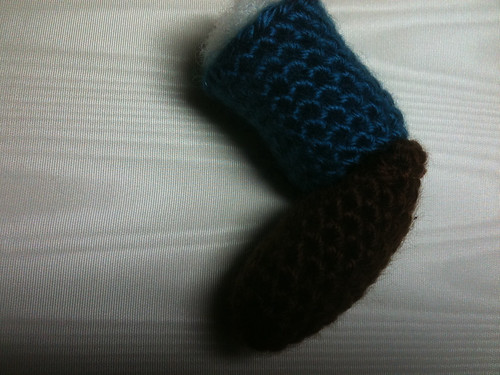
XMAS GIFT #6: (WIP)
LUIGI
 |
'Luigi' picture from wikipedia.org
This image is an illustration of a character or characters in a comic book, video game, or animated television program or film. The copyright for it is most likely held by either the publisher/producer and/or artist(s) producing the work in question. It is believed that the use of low-resolution images of character artwork:
for commentary on the character or characters in question,
on the English-language blog: http://kissingtoast.blogspot.com/ qualifies as fair use under United States copyright law. Any other uses of this image, on this blog or elsewhere, may be copyright infringement. |
Here are a few pics of my progress so far on the Luigi Ami:
THE HEAD:
 |
| Luigi Head (minus details) |
THE TORSO:
 |
| Luigi Torso |
THE NOSE:
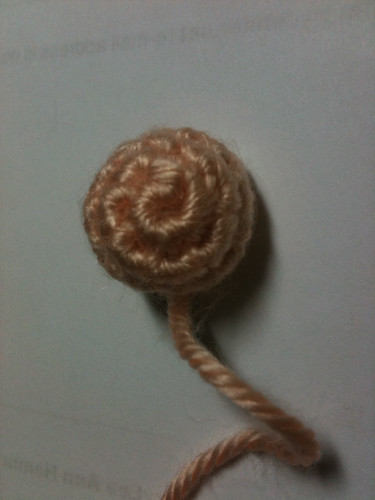 |
| Luigi Nose |
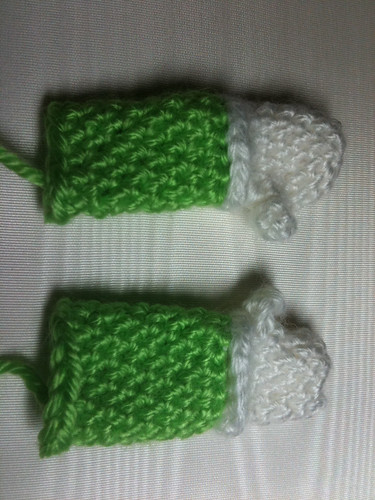
THE EARS: (2)
 |
| Luigi Ears |
THE MUSTACHE:
 |
| Luigi mustache |
XMAS GIFT #8: (WIP)
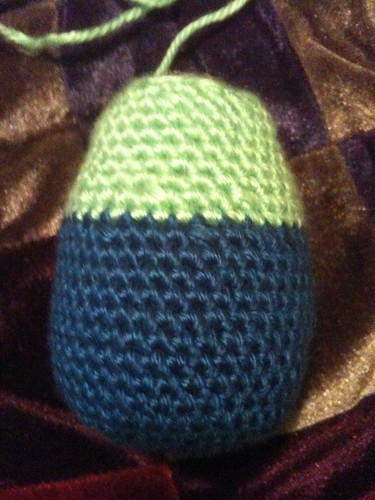
CROCHET RING BRACELET
The Crochet Ring Bracelet is something that I have made before, and is one of my favorite gifts to make for the women in my family. It is super simple, consisting of only sc's into the center of an 'o' ring, and doesnt take very long to make.
Materials:
Crochet thread
(I like to use Omega Hilo 100% Nylon thread)
Plastic 'o' rings
small amount of jewelery wire (for clasp)
Here is a picture of the WIP followed by a picture of a FO of a previously made crochet ring bracelet
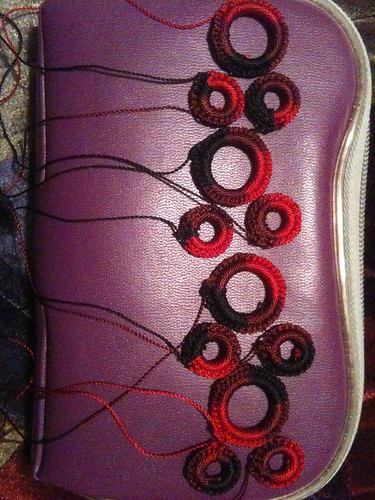 |
| Crochet Ring Bracelet WIP |
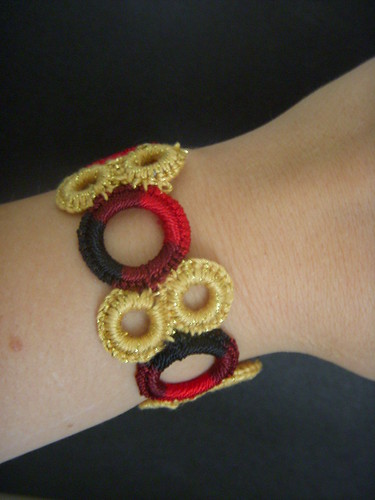 |
| Previous FO -- Crochet Ring Bracelet |
Well....that about does it for this week! Whew....
Hopefully I will have finished my Hello Kitty Purse, Luigi, and Crochet Ring Bracelet by next Wed, and be ready to start on my Mario!
See you next week, and thanks for reading!!!