Help Joe Get a New Pancreas

Saturday, May 25, 2013

Joe needs a new Pancreas | Medical Expenses - YouCaring.com


Joe needs a new Pancreas | Medical Expenses - YouCaring.com

My 29 year old brother Joseph has been a Type 1 insulin dependent diabetic since he was 15 years old. He has spent many years struggling with this disease. Over the past year, the disease has taken a turn for the worse. After years of specialists, insulin pumps, and insulin therapy, his Endrocinologist has exhausted all treatments and therapy and has determined that my brother is suffering from Hypoglycemic unawareness, the inability for his body to respond to low blood sugar which results in dangerous life threatening low blood sugar resulting in a deficient pancreas.

This diagnosis in conjunction with years of non-compliance to insulin therapy & treatments leaves only one viable option for survival, a Pancreatic organ Transplant.

In order to be approved for the transplant surgery, weekly visits to Houston are mandatory for testing, education classes, and meetings with Transplant teams at the Hospital. 3 Caregivers are required for pre & post-transplant needs for my brother. I am one. Once approved for the transplant, relocation to Houston is mandatory for him & his caregivers for a minimum of 4-6 weeks but could be longer depending on my brother’s recovery time & new organ cooperation.

What fundraising would assist with:
  • Travel to Houston for appointments and evaluations (Gas, Food, Lodging, Hospital Parking, Pre-Surgery Medication & treatments, Specialist costs not covered by insurance)
  • Surgery itself is around 130k. Insurance will pay majority of surgery costs minus the following:
  • $5,000 maximum out of pocket expenses
  • $1,200 insurance deductible
  • Post-Surgery Medications up to $500 per month
  • Other Misc Medical Bills for treatment and Surgery including regular follow-up appointments with the surgical center in Houston
  • 4-6 Weeks relocation costs to Houston post Transplant. (Lodging, Food, Gas, Medications, Specialist costs not covered by insurance)
  • Bills at Home post-transplant during recovery. (Utilities, Food, Mortgage, Car Bills etc.) 

What is my Brother’s life like now?
  • Has been diagnosed with a Severe case of Type 1 Diabetes that includes:
  • Pancreas is at a 0.2 percentage of functionality
  • Hypoglycemic unawareness - inability for the body to respond to low blood sugar which results in dangerous life threatening low blood sugar
  • Severe Hypoglycemia (Low Blood Sugar)
  • Has frequent Diabetic Seizures
  • His License has been revoked due to multiple car wrecks involving diabetic seizures
  • Has Diabetic Neuropathies (Nerve Damage in the legs and feet)
  • Is Unable to work
  • Has Lost 2 jobs from diabetic low blood sugars and collapsing while working as this is a liability for employers
  • My brother is an amazing photographer which he has a great passion for that he is unable to do any more due to his physical condition
  • Has a Wife and 2 young children (7 year old son & 1 year old daughter)
  • Sister in law is currently the sole provider of income for the household with minimal contributions from immediate family members who help when they can
  • My mother currently lives at their house during the week to help take care of my niece and my brother since his seizures are so frequent
  • Family/Neighbors have placed over 50 emergency 911 calls for help since 5/1/2012
  • Cannot walk around the block with kids without passing out/collapsing due to low blood sugars
  • Diabetic Endocrinologist has exhausted all treatment options and a pancreatic transplant is the last hope

What will my Brother’s life be like after a pancreas transplant
  • Pancreatic Transplant has the potential to 100% cure my diabetes
  • Blood sugars will stabilize
  • No more fear of seizures, passing out, collapsing or injury from diabetic episodes
  • No longer needing to take insulin injections
  • Being able to return to work
  • Extending my life expectancy & Quality of Life
  • The elimination of the constant fear of death

And most importantly!!

Being able to play with my kids

Monday, December 24, 2012

A little Christmas Star Wars Cheer

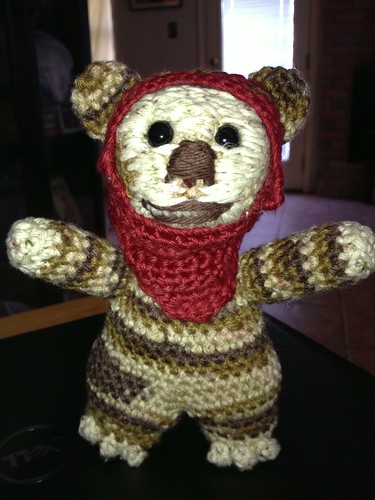
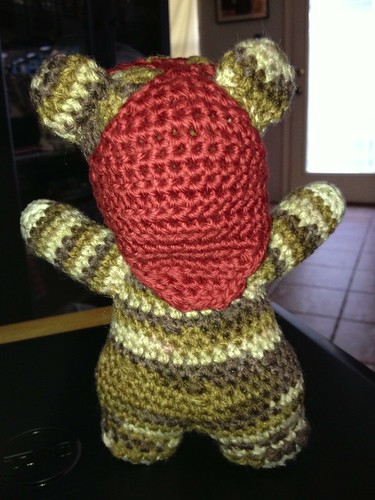
So procrastination has gotten the best of me and the rush to finish a few crocheted Christmas gifts has kept me without much sleep in the last day and night. I have finished one of the gifts today (after burning the midnight oil until about 6am and starting all over again at 11am today...whew!) This FO was well worth the hours of work and sleeplessness as this lil guy turned out awesome. This gift is for my brother who is one of the biggest Star Wars geeks I know, who just so happens to be one of the few loyalists who like and appreciate those adorable butt-kicking Ewoks of Endor from Return of the Jedi.

So you ask, what better gift for a fan of the Ewoks and a fan of the 6th installment of Star Wars....of course...an Amigurumi Wicket!!


The pattern I used was manipulated from an original pattern ("Wicket-the-Ewok") by Lucy Ravenscar found on RavelryThe Pattern is also available at Craftster. I switched up a few things, just to make it my own and to adapt to my style of crochet.

This project was challenging in the following ways:
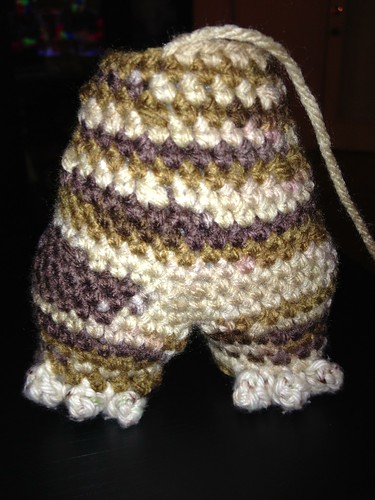
  • The torso is worked in 1 piece from the bottom up. This is a different technique that was very effective for the shape of the lower body, but not one I am accustomed to using, I plan on using similar methods in the future for legs/feet. The single torso structure aids in stability and form.
    Wicket Torso with toe detail
  • The pattern called for using a 3 dc bob stitch for the hands/arms and a 3 dc pop stitch for the feet/toes. Both of these stitches were a first for me. I ended up scrapping the 3 dc bob stitch for the fingers/hands and utilized a basic arm in the round instead. The finger work was a bit cumbersome to work with and I felt they ended up a tad too busy. I kept the special stitch 3 dc pop for the toes as they were great for the balance and overall look of the ami
Standard Arms worked in the round
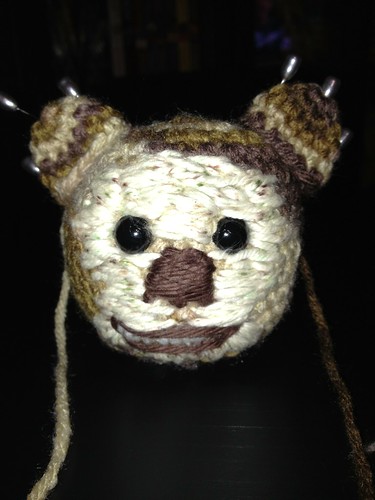
  • There were 2 options for creating the face/head of Wicket. I opted for the more detailed and challenging of the two: Head #1 which uses embroidery detailing for the face and mouth. This was the most time-consuming aspect of the project, but all the time and effort that went into the detailing was well worth it! 
Wicket Head with embroidery detail
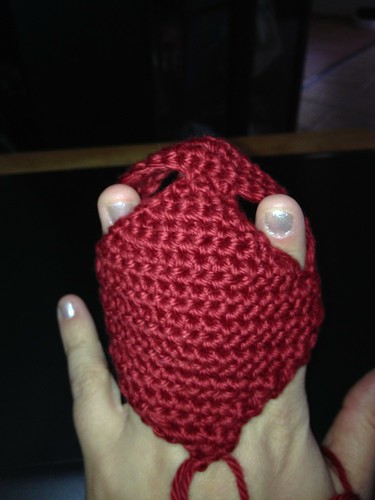
  • There were 2 options for creating the cowl. I originally was going to move forward with using felt for the cowl, which would have been a bit quicker, and the color I had picked out was nearly spot-on...something just told me to go for the crochet method for the cowl. Even though the yarn I had in my stash was a dark burnt orange vs a lighter russet color (which is more accurate) I think it makes the Ami a bit more unique & crocheting it was a blast! The cowl was worked in 2 parts (front/back) then whip stitched together & slipped over the head (So yes...it can be removed!)
Wicket Cowl
Overall, I am super excited to give this gift to my brother tonight, as I know he will be excited! The only hard part is giving Wicket away, as he turned out so cute, & a part of me wants to keep him for myself....I guess I can always make another one!!

Wicket!

Wicket (Back view)

Now onto the next gift....

    
Thanks for reading!

Sunday, October 14, 2012

Secret Project #2 FO! - Cute Cthulhu

So...It has been a while, but I finally was able to finish up my latest Secret Project!

A little recap about my Secret Project progress...and the big reveal at the end!

I had a lot of fun with my last Secret WIP posts that I thought I would start up another round here. Quite a few of my friends/family have caught baby fever over the past year and lil ones are popping up all around me. My last Secret FO was an 'Under the Sea' themed baby mobile that was unveiled at my Sister in Laws baby shower. Here it is installed in my niece's room:

Under The Sea
I am super excited about being able to FINALLY finishing up this latest Super Secret Amigurumi for this sweet lil one! Here are a couple of pictures of the "pieces" of the project I have posted along the way:

Hint...There are two of these!
Eye C U!
Look...it's a bird! it's a plane! it's...
LIL CTHULHU!!!

YES!...Super Secret Project #2 is an Amigurumi Cthulhu!


I got the idea to make this little guy from a co-worker who recently had her first lil boy. She described that they were decorating the lil ones room in a mythological creature theme...How cool is that? and...What better mythological creature is there than Cthulhu? A little bit about the Cthulhu mythos:

From wikipedia.org..."Cthulhu[1] is a fictional cosmic entity who first appeared in the short story "The Call of Cthulhu", published in the pulp magazine Weird Tales in 1928. The character was created by writer H. P. Lovecraft." "H. P. Lovecraft's initial short story, "The Call of Cthulhu", was published in Weird Tales in 1928 and established the character as a malevolent entity hibernating within an underwater city in the South Pacific called R'lyeh. Described as resembling "...an octopus, a dragon, and a human caricature.... A pulpy, tentacled head surmounted a grotesque scaly body with rudimentary wings",[6]the imprisoned Cthulhu is apparently the source of constant anxiety for mankind at a subconscious level, and also the subject of worship by a number of religions (located in New Zealand, Greenland, Louisiana, and the Chinese mountains) and other Lovecraftian monsters (called Deep Ones[7] and Mi-Go[8]). The short story asserts the premise that, while currently trapped, Cthulhu will eventually return. His worshipers chant "Ph'nglui mglw'nafh Cthulhu R'lyeh wgah'nagl fhtagn" ("In his house at R'lyeh, dead Cthulhu waits dreaming.")[6]"


I can't wait to deliver this super-duper adorable Cthulhu Ami...as I think they will be very happy!
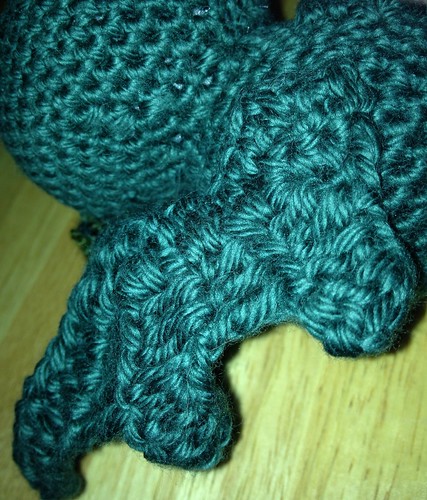
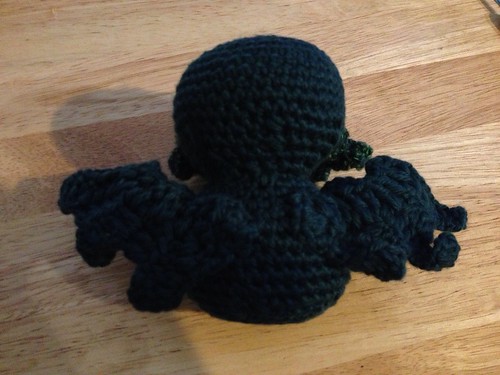
Back/Wing Detail
Side View
Thanks for reading!


Tuesday, June 26, 2012

Secret Project #2 WIP #2

So here is a little recap about my Secret Project WIPs...

I had a lot of fun with my last Secret WIP posts that I thought I would start up another round here. Quite a few of my friends/family have caught baby fever over the past year and lil ones are popping up all around me. My last Secret FO was an 'Under the Sea' themed baby mobile that was unveiled at my Sister in Laws baby shower. Here it is installed in Nora's room:

Under The Sea

I am super excited about my next Secret WIP for the next lil one! I plan on posting the components of the project here as they are completed. I cannot unveil exactly what I am cooking up, since it is a gift, but it will be fun posting lil "glimpses" of the project along the way,


Her is the first glimpse that I unveiled in my last post:


Hint...There are two of these!

And on to the next glimpse:

Eye C U!

Here is one more hint...this is also a creature of the sea! I am almost finished with this lil cutie & hope to post the FO here for all to see soon!


Stay tuned for more to come!!!!

Thanks for reading.

Friday, June 8, 2012

Secret Project #2 WIP


I had a lot of fun with my last Secret WIP posts that I thought I could start up another one here. Quite a few of my friends/family have caught baby fever over the past year and lil ones are popping up all around me. My last Secret FO was an 'Under the Sea' themed baby mobile that was unveiled at my Sister in Laws baby shower. I am super excited about my next Secret WIP for the next lil one! I plan on posting the components of the project here as they are completed. I cannot unveil exactly what I am cooking up, since it is a gift, but it will be fun posting lil "glimpses" of the project along the way.

Here is the first glimpse:

What could it be?

The picture is a bit dark, but this is the start of the Amigurumi.


Stay tuned in for further glimpses of my new Secret WIP!!!


Thanks for reading.

Friday, April 27, 2012

Secret Project FO!!


Secret Project FO revealed!


My most recent set of WIPs were all components leading to a special gift for a special someone....my unborn niece! This FO is comprised of multiple Amigurumi that have been unveiled over the last few weeks here in this blog:

Floppy the Fish

Floppy the Fish

Baby Octopus

Baby Octopus

Mr Dolphin

Mr Dolphin


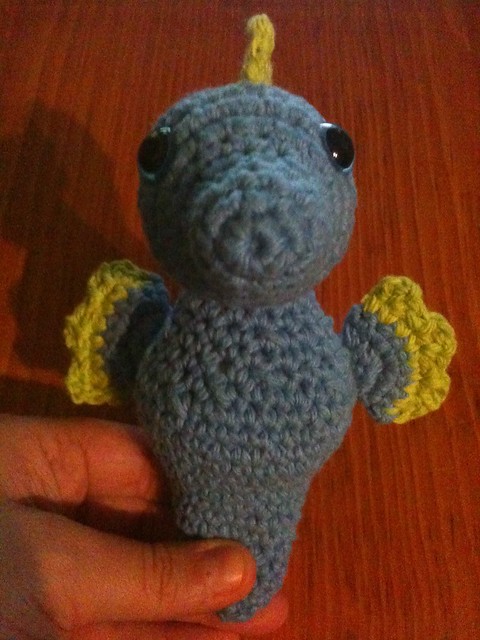
Lil Seahorse

Lil Seahorse

Starfish

Starfish


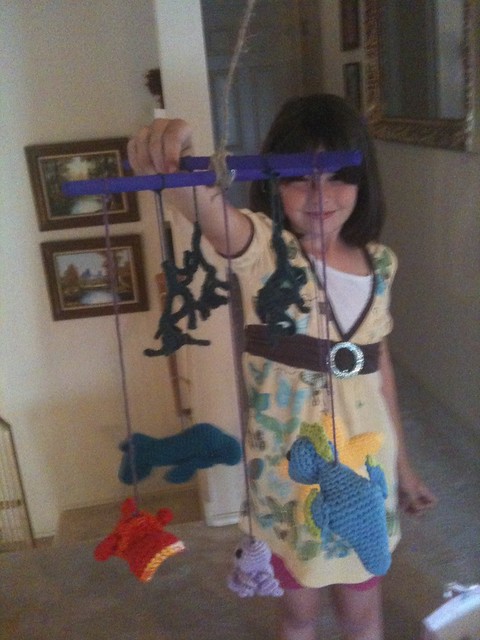
I finally made 4 strands of seaweed found from a pattern on Lion Brand yarn found here... 2 dowel rods painted purple...some heavy duty twine...a hot glue gun...


...and what do you get?

A sea themed Baby Mobile!!!


I was really excited with the way it turned out & I was able to unveil the FO at my Sister-In-Laws baby shower that I hosted. Everyone really liked the way it turned out as well & I can't wait to see it hanging in the baby's room!!!!

Thanks for reading!

Sunday, April 22, 2012

Secret Project WIP #4


My most recent set of WIPs (that I am highly anticipating I might add,) are components leading to a special gift for a special someone. This WIP is comprised of multiple Amigurumis. I plan on posting the components of the project here as they are completed. I cannot unveil exactly what I am cooking up, since it is a gift, but it will be fun posting the little bits along the way.

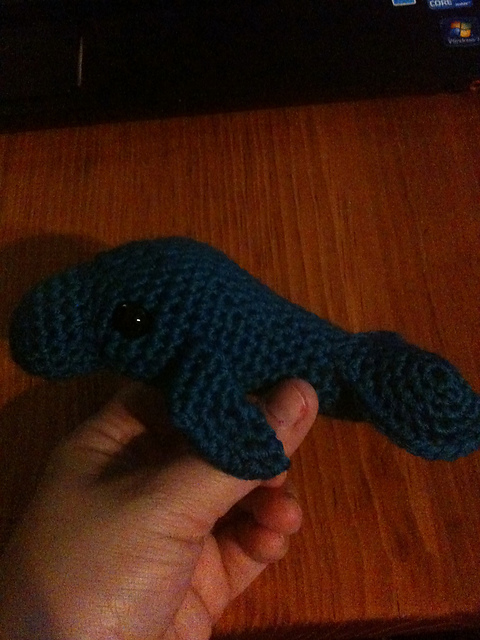
My last post detailed the FO, Mr Dolphin. I decided to make the dolphin sea green/blue as opposed to grey as Dolphins usually are. I really like the color of the yarn and figured I would be a little playful with the pattern.

The pattern for this dolphin can be found in Annie Obaachan's book, Super Cute: 25 Amigurumi Animals. This was the first Amigurumi crochet book I purchased when I first started to crochet, and it is still a standard of mine. I highly recommend it, as the patterns are easy to follow for a beginner, and has some great tips for Ami construction (even for an experienced crocheter.)

For this post I am going to unveil 2 more components of this super secret WIP!!!

Lil Seahorse & Starfish!!!!

Lets start with the Lil Seahorse first:


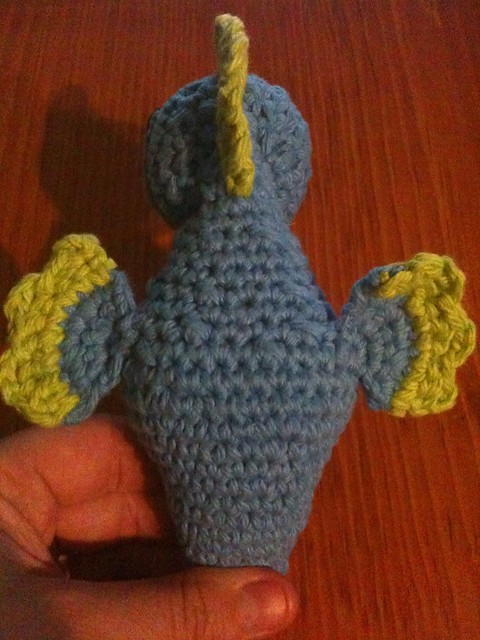
This was the first seahorse ami I have ever made. I found the pattern from the blog Mausica's Magical Menagerie. This pattern is super cute & was simple and a blast to make. I decided to make the seahorse baby blue and lime green. I like the colors and thought they would complement each other and the rest of the  components of the overall project. Here are a few pics of the FO:
Lil Seahorse FO
Lil Seahorse (Back View)
Lil Seahorse FO (Side View)
Now for the 2nd FO for this Super Secret WIP...a super adorable Starfish:
"Betta Treasures Seahorses Victorian Brass Aquarium"

The Starfish was a really challenging Ami to figure out. The components (the star points) and the center piece(s) (the body) were easy enough to make, however, the making up of the Ami was a bit on the difficult side. I found the pattern here. After creating each star point and the front and back side of the starfish body, you have to sew six stitches from each of the star points onto a body panel. This takes some trial and error to make sure they are evenly spaced. You then need to stuff the star points before you sew the back panel of the center piece onto the other sides of the starpoints. You then have to stuff the body before you completely sew up the Starfish. I will include a few pics of the WIP so that the words have some context:

Starfish FO
Back side of Starfish before stuffing star points


Stay tuned in a day or two for the unveiling of FO of my Super Secret WIP!!!

Thanks for reading.